Ductless Versus Central Air for Your Home

Compare ductless versus central air for comfort, cost, efficiency, installation, and the right home cooling choice for your budget when choosing AC.

A hot upstairs bedroom, a stuffy home office, and rising summer power bills can make one question feel urgent: ductless versus central air, which system will actually make your home more comfortable? The right answer depends less on what is newest and more on your home’s layout, existing equipment, and how you use each room.

Central air remains an excellent whole-home solution for many properties. Ductless mini-splits can be a smart fit for homes without ducts, additions, and rooms that never seem to cool properly. Both systems can deliver efficient, dependable cooling when they are sized and installed correctly.

Ductless Versus Central Air: The Core Difference

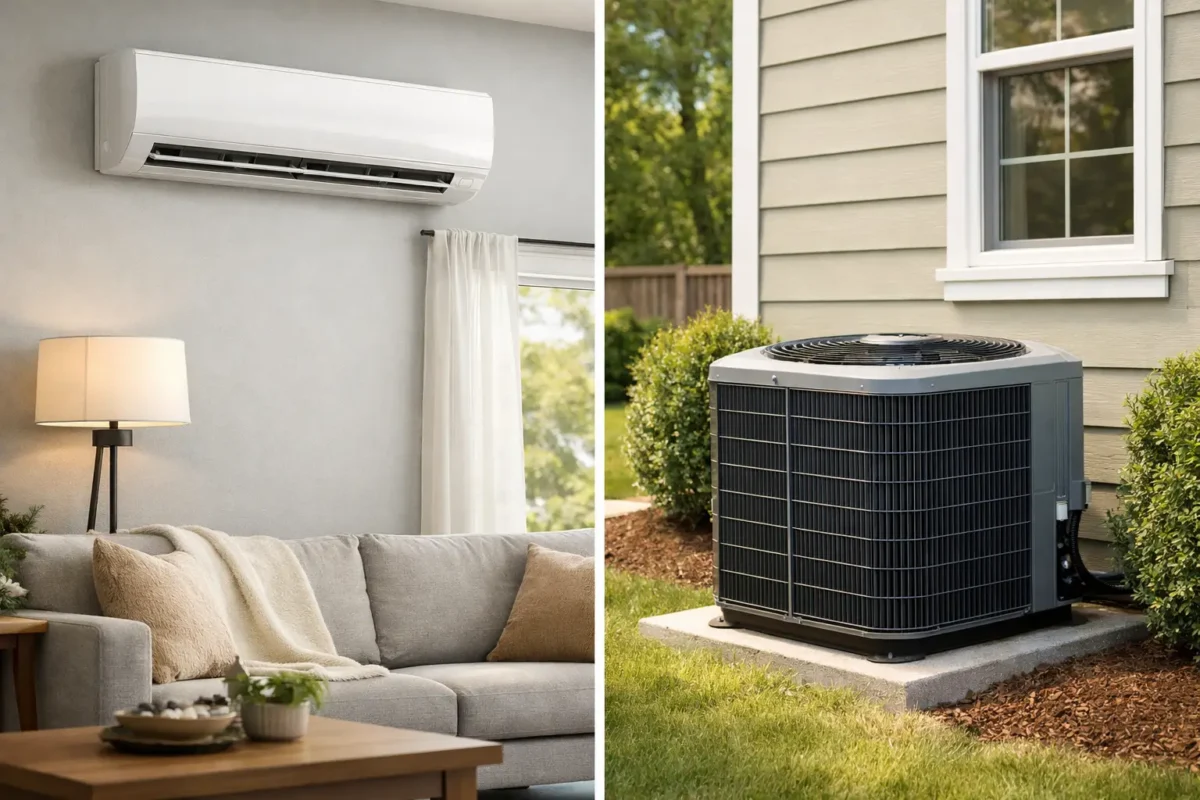
Central air conditioning moves cooled air through a network of supply and return ducts. It typically uses an outdoor condenser paired with an indoor coil installed alongside a furnace or air handler. One thermostat generally controls the home, although zoning can add more room-by-room control.

A ductless system uses an outdoor unit connected to one or more indoor air handlers. Each indoor unit serves a specific room or zone and has its own temperature setting. Small refrigerant lines run through an exterior wall, so the installation does not require a full duct system.

That difference shapes nearly every part of the decision. Central air is designed to cool the house as a connected whole. Ductless cooling is designed to put comfort precisely where it is needed.

When Central Air Makes the Most Sense

If your home already has ductwork in good condition, central air is often the most straightforward option. You can use the distribution system already serving your furnace, avoiding the visual impact of indoor wall-mounted units and delivering conditioned air to bedrooms, hallways, and common areas through existing vents.

Central air can be especially practical for families who want consistent comfort throughout the house. A properly designed system can cool multiple levels and enclosed rooms without requiring separate indoor equipment in every space. It also works well when you prefer a single thermostat and a familiar, low-profile setup.

However, ducts must be evaluated before installation. Leaky, undersized, poorly insulated, or poorly balanced ducts can waste energy and leave certain rooms uncomfortable. Replacing an old air conditioner without addressing duct problems may improve performance, but it will not fully solve uneven temperatures caused by the air delivery system.

Central air also integrates well with whole-home indoor air quality equipment. Depending on the system, options may include upgraded filtration, humidification, UV treatment, or fresh-air ventilation. For homeowners managing allergies, pet dander, or dust across the entire home, that broader approach can be valuable.

Where Ductless Systems Have an Advantage

Ductless mini-splits are often the better answer when ducts are missing or when extending ductwork would require major renovation. Older homes, converted garages, finished basements, attic spaces, sunrooms, and new additions are common examples. Instead of opening walls and ceilings to install duct runs, a technician can connect compact indoor units to an outdoor condenser.

Zoning is the other major advantage. If one family member likes a cooler bedroom while another prefers a warmer office, ductless systems allow those rooms to be controlled independently. You can cool occupied areas without sending conditioned air to rarely used guest rooms or storage spaces.

Many ductless systems are heat pumps, meaning they can provide efficient cooling in summer and heating during milder weather. In the Lower Mainland, that can make them a useful part of a year-round comfort plan. For homes that rely on boilers, radiant heat, or electric baseboards and do not have forced-air ducts, a ductless heat pump can add both cooling and supplemental heating without changing the entire heating system.

The trade-off is that indoor units are visible. Wall-mounted heads are common, though ceiling cassettes and concealed options may be available for some homes. Good placement matters. A unit should direct air effectively without blowing straight onto a bed, desk, or favorite seat.

Comparing Installation Cost and Long-Term Value

The lowest initial price is not always the lowest-cost choice over time. Central air may cost less to install when usable ducts and a compatible furnace or air handler are already in place. If ductwork needs extensive repair or must be added from scratch, the project cost can rise quickly.

Ductless systems avoid most duct construction, but multi-zone systems require additional indoor heads, line sets, electrical work, and labor. A single-zone unit for a home office or addition is very different from a whole-home multi-zone installation. The number of rooms, equipment capacity, electrical needs, and accessibility all affect the estimate.

Energy use also depends on how the system is operated. Ductless zoning can reduce wasted cooling when only part of the home is occupied. Central air can be highly efficient too, particularly when paired with sealed ducts, a variable-speed system, and a properly programmed thermostat. Efficiency ratings matter, but correct sizing and quality installation matter just as much.

Available rebates can influence the value of an energy-efficient upgrade. Requirements change, and eligible equipment, installation details, and application steps can all affect savings. A qualified contractor can help you compare options based on the incentives available for your property rather than assuming every high-efficiency system qualifies.

Comfort, Noise, and Maintenance Considerations

Both options should run quietly when installed correctly. Central air places most of its operating equipment outside and inside a mechanical area, with airflow coming through vents. Ductless indoor heads have quiet fans, but you may notice airflow and gentle operating sounds in the room where the unit is installed.

Maintenance is not optional for either system. Central air needs routine filter changes, outdoor coil cleaning, drain checks, and periodic inspection of electrical components and refrigerant performance. Ductless units need their washable filters cleaned regularly, and their indoor coils, drains, and blowers require professional service to prevent dust buildup, odors, and reduced airflow.

For central air, ask whether your existing ducts should be sealed, cleaned, insulated, or balanced. For ductless, ask how many zones are truly needed and where each head will be located. Oversizing either system can lead to short cycling, uneven comfort, and unnecessary expense. Undersizing leaves the home struggling on the hottest days.

Choose Based on Your Home, Not a Sales Pitch

A central system is usually the stronger choice when you have dependable ductwork and want discreet, whole-home cooling with broad indoor air quality options. Ductless may be the better fit when you need targeted comfort, have no ducts, want to cool an addition, or need to solve persistent hot and cold spots.

Some homes benefit from both. Central air may handle the main living areas while a ductless unit serves an upper-floor bedroom, a sunroom, or a renovated space that the existing system cannot reach well. This hybrid approach can protect comfort without forcing a major duct renovation.

The most useful next step is an in-home assessment that considers insulation, window exposure, duct condition, room use, electrical capacity, and your existing heating equipment. Pro West Heating & Air Conditioning can help homeowners weigh these details, explain efficient equipment options, and provide a clear estimate. The best cooling system is the one that keeps your home comfortable where life actually happens, without creating avoidable costs later.
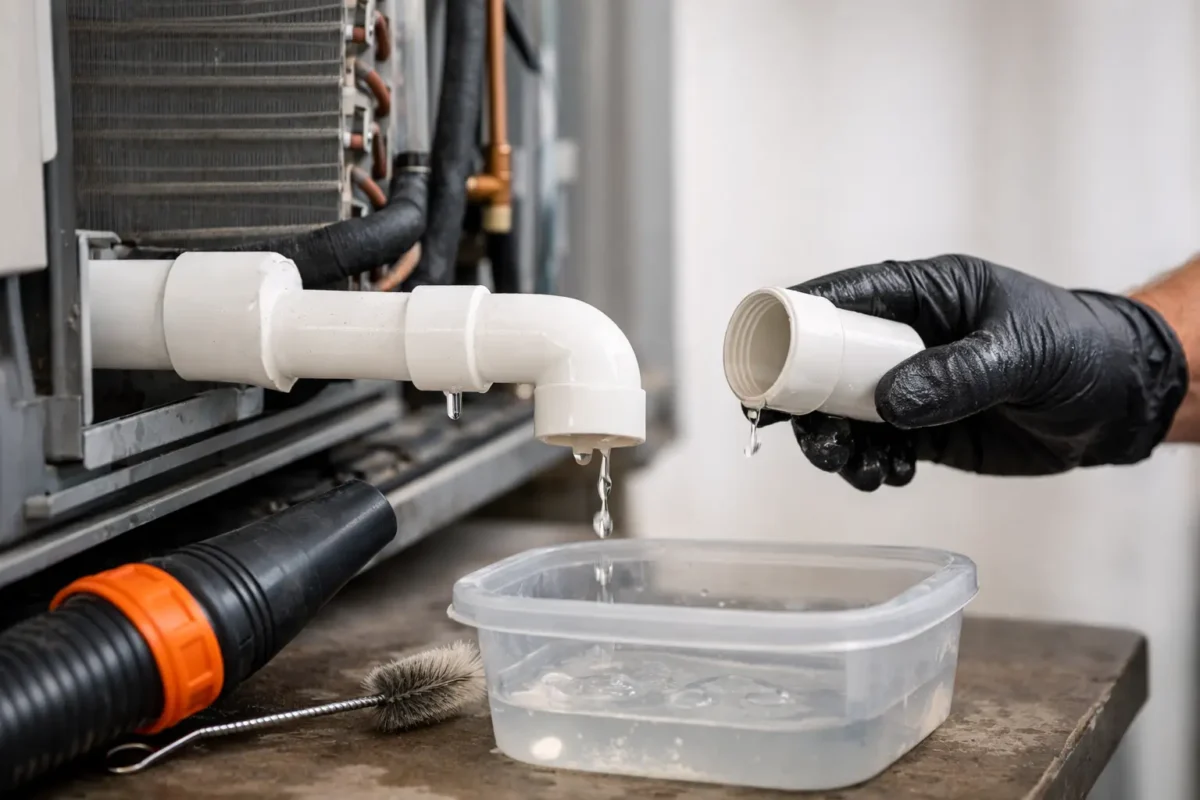

How to Clean Condensate Drain Lines Safely

Learn how to clean condensate drain lines safely, clear common clogs, prevent water damage, and know when to call an HVAC technician for service today.

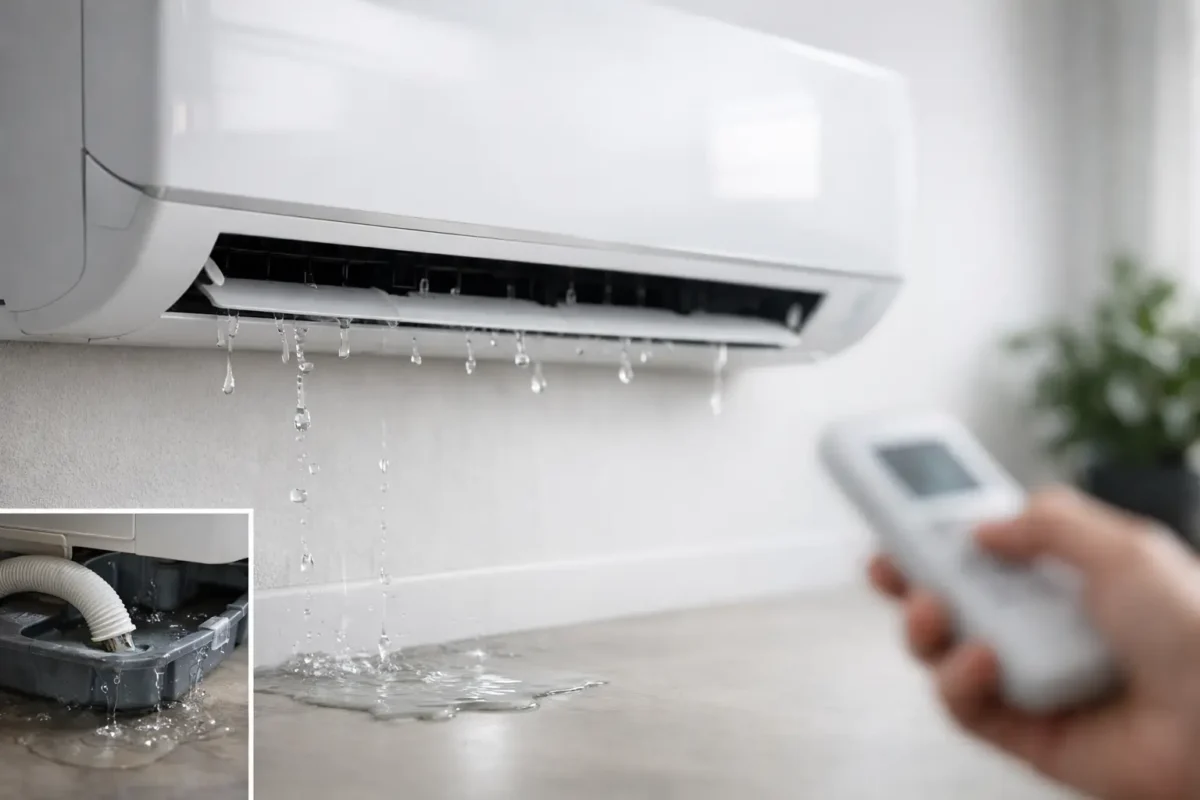
A small drain line can create a big mess. When an air conditioner, heat pump, or high-efficiency furnace cannot drain condensation properly, water may back up into the unit, stain ceilings, damage flooring, or shut your cooling system down. Knowing how to clean condensate drain lines gives homeowners a practical way to prevent one of the most common warm-weather HVAC service calls.

The job is usually straightforward when the clog is minor and the drain is accessible. Still, condensate systems vary by equipment type and installation. If water is leaking near electrical components, overflowing from a secondary drain pan, or returning soon after cleaning, stop and schedule professional service. The drain may not be the only issue.

What a Condensate Drain Does

Your cooling system removes humidity from indoor air as it operates. That moisture collects on the indoor evaporator coil and drips into a pan below it. From there, it flows through a PVC drain line to a safe discharge point outside the home, into a plumbing drain, or to a condensate pump.

Because the line carries water, it can develop algae, mold-like buildup, dust, and sludge over time. A partially blocked line drains slowly. A fully blocked line can cause water to overflow the drain pan. Many newer systems have a float safety switch that shuts the equipment off before water damage occurs, but not every system has one, and safety switches can also fail.

High-efficiency furnaces create condensate during heating season as well. Their drain setups can be more complex than a standard air conditioner drain, so homeowners should be more cautious when cleaning them. If you are unsure which line belongs to which appliance, have an HVAC technician inspect it.

Signs Your Condensate Drain Needs Attention

A clogged drain does not always announce itself with a visible puddle. Watch for water around the indoor unit, moisture in the drain pan, a musty odor from supply vents, or an air conditioner that stops running even though the thermostat is calling for cooling.

You may also notice water dripping from a pipe outside when the system is off, bubbling at an indoor drain connection, or a condensate pump that runs constantly or makes unusual noise. In an attic, closet, utility room, or crawlspace installation, check the area around the equipment regularly during peak cooling weather. Catching a slow drain early is far easier than repairing a wet ceiling later.

How to Clean Condensate Drain Lines Step by Step

Before you begin, turn the thermostat to Off and switch off power to the indoor HVAC equipment at the service switch or breaker. This protects you from moving parts and electrical components while you work. Let the system sit for a few minutes.

You will typically need a wet/dry vacuum, white distilled vinegar, a small funnel, a clean cloth, and possibly a screwdriver. Avoid using compressed air at high pressure. It can separate glued drain fittings, force debris deeper into the line, or push dirty water back into the unit.

1. Find the drain line and cleanout opening

Locate the PVC drain pipe leaving the indoor air handler, furnace, or evaporator coil cabinet. Many installations include a vertical capped section near the unit called a cleanout or access tee. Remove the cap carefully. If the pipe has a trap, do not take apart fittings unless you know how they go back together and can confirm they are sealed afterward.

Look into the opening with a flashlight. Standing water, dark slime, or debris near the top points to a restriction. Wipe accessible buildup from the opening and drain pan area with a cloth. Do not scrape the evaporator coil or reach into the cabinet around wiring.

2. Clear the drain from the discharge end

Find where the drain line terminates. It may exit near the outdoor condenser, run to a plumbing drain, or feed into a condensate pump. If it ends outdoors, place the hose of a wet/dry vacuum over the drain outlet and create a snug seal with your hand or a cloth.

Run the vacuum for one to two minutes. You may pull out water, algae, and sludge. This method is generally safer and more effective than blowing air into the line from inside. If the termination is connected to household plumbing or difficult to access, do not force the issue. A technician can clear and test the line without risking a plumbing backup.

3. Flush the line with vinegar

Return to the cleanout near the indoor unit. Pour about one cup of white distilled vinegar slowly into the opening using a funnel. Vinegar helps break down light biological buildup without the harshness of bleach. Give it 20 to 30 minutes to work, then flush with a small amount of clean water.

Avoid bleach, drain cleaner, and boiling water. Bleach fumes can be unpleasant indoors, harsh chemicals may damage parts of the system, and boiling water can affect plastic piping or fittings. Vinegar is suitable for routine maintenance, but it will not solve a crushed pipe, an incorrect drain slope, or a heavy blockage farther down the line.

4. Check the pan, trap, and float switch

Inspect the primary drain pan beneath the coil if it is visible. It should not be holding water after the line is cleared. If your system has a secondary pan, often found beneath attic equipment, check for standing water there as well. A wet secondary pan is a warning that the primary drain is not working correctly.

Some systems have a float switch on the drain line or pan. This safety device turns the equipment off when water rises too high. Do not bypass it to get the air conditioner running. If the switch has tripped, cleaning the line may restore normal operation, but the switch and drain should still be checked if the problem repeats.

5. Restore power and confirm proper drainage

Replace the cleanout cap securely, restore power, and set the thermostat to Cool. Let the system run long enough to produce condensation, especially on a humid day. Then check for steady drainage at the outlet or verify that water is moving through the line.

If the system immediately shuts off, water continues to collect in the pan, or the drain still does not flow, turn it off again. The clog may be stubborn, the trap may be dry or improperly installed, or the system may have a pump or drain design issue that needs professional repair.

When a Condensate Pump Is Involved

A condensate pump is used when gravity cannot carry water from the indoor unit to a drain. It collects water in a small reservoir and pumps it through tubing to a suitable discharge point. These pumps need occasional maintenance, too.

First, confirm the pump has power and that its reservoir is not overflowing. Clean accessible debris from the reservoir according to the equipment instructions, then test whether the pump activates as water enters. Do not open electrical sections or disconnect pump wiring. A failed pump can allow water to overflow quickly, so call for service if it will not run, runs without moving water, or leaks from the housing.

How Often Should You Clean a Condensate Drain?

For most homes, cleaning the condensate line once each cooling season is a sensible preventive step. Homes with long cooling seasons, high indoor humidity, pets, dusty conditions, or recurring algae buildup may benefit from checking it every two to three months while the air conditioner is in use.

Routine HVAC maintenance is the best time to have the entire condensate system inspected. A technician can check the drain pan, trap, float switch, pump, pipe slope, insulation, and discharge location while also servicing the coil and confirming the system is operating efficiently.

When to Call an HVAC Professional

DIY cleaning is appropriate for a visible, minor clog in an accessible line. Professional help is the better choice when water has reached ceilings, walls, or electrical equipment; the drain line is hidden; the system is in an attic; or the same clog returns repeatedly. A recurring blockage can point to improper installation, a damaged drain line, a dirty evaporator coil, or a missing trap.

Call promptly if your air conditioner is not cooling, a safety switch keeps shutting the system down, or you suspect a condensate leak from a high-efficiency furnace. Fast service can protect both your equipment and your home from a much more expensive water-damage repair.

A clean condensate drain is a small maintenance task with real payoff: fewer interruptions, less risk of leaks, and more dependable home comfort when you need cooling most.

How to Improve Indoor Air Quality at Home

Learn how to improve indoor air with practical steps for ventilation, filtration, humidity, and HVAC care for a healthier, more comfortable home daily.

A home can feel clean and still have air that works against your comfort. Cooking fumes, pet dander, dust, wildfire smoke, excess moisture, and everyday household products can all build up indoors. Knowing how to improve indoor air starts with finding the source of the problem, then choosing practical improvements that fit your home and HVAC system.

For homeowners in the Lower Mainland, indoor air quality often changes with the season. Damp weather can encourage mold and mildew, while closed windows during cold snaps or smoky summer days can trap pollutants inside. The goal is not to make your home completely sterile. It is to create cleaner, fresher air while keeping heating and cooling efficient.

How to Improve Indoor Air With Source Control

The most effective air-quality upgrade is often removing pollutants before they circulate. Air cleaners and furnace filters can help, but they work better when they are not asked to solve every problem on their own.

Start in the kitchen. Use the range hood whenever you cook, especially when frying, searing, or using a gas cooktop. A hood that vents outdoors is far more effective than one that only recirculates air through a small filter. Keep the hood clean so grease does not reduce airflow.

Take a close look at cleaning products, air fresheners, candles, and scented sprays as well. Strong fragrances can be irritating for people with asthma, allergies, or chemical sensitivities. Choose low-odor products where possible, and avoid using heavily scented products to cover up a musty smell. A persistent odor usually points to a moisture, drainage, plumbing, or ventilation issue that needs to be addressed.

Shoes, pets, and open windows also bring particles indoors. Placing quality mats at entryways, vacuuming regularly with a sealed or HEPA-equipped vacuum, and grooming pets can reduce the dust and dander that settle in carpets and furniture. If outdoor smoke or pollen levels are high, keep windows closed and use filtration instead of relying on open-window ventilation.

Use the Right Filter for Your HVAC System

Your furnace or air handler filter is a first line of defense, but it must be matched to the equipment. A higher MERV rating can capture smaller particles, including finer dust, pollen, and some smoke particles. However, a filter that is too restrictive for an older system can reduce airflow, increase strain on the blower, and affect heating or cooling performance.

For many homes, a properly fitted MERV 8 to MERV 11 filter is a practical balance between filtration and airflow. Homes with allergies, pets, or recurring dust concerns may benefit from a higher-efficiency option, but the system should be evaluated first. Filter upgrades are not one-size-fits-all.

Check the filter monthly and replace it as needed. A filter may need attention sooner during wildfire season, renovations, heavy heating use, or if you have multiple pets. Do not wait until it looks completely blocked. Restricted airflow can lead to uneven temperatures, higher utility costs, and unnecessary wear on your equipment.

If your home uses radiant heating or a boiler and does not have ductwork, a central furnace filter is not an option. In that case, portable air cleaners, bathroom and kitchen exhaust, and balanced ventilation can play a larger role.

Choose portable air cleaners carefully

A portable air purifier can make a real difference in bedrooms, nurseries, home offices, or other rooms where people spend long periods of time. Look for a unit with a true HEPA filter and a recommended room size that matches the actual space. If the purifier is too small for the room, it will run constantly without delivering the expected results.

Place it where air can circulate freely, not behind furniture or tight against a wall. For smoke events, run it continuously in the room you are using most. Avoid devices that intentionally produce ozone. Ozone can irritate lungs and is not a suitable substitute for mechanical filtration.

Balance Ventilation Without Wasting Energy

Fresh outdoor air dilutes indoor pollutants, but ventilation needs to be managed thoughtfully. Opening windows can help on mild, low-pollution days. It is less helpful when outdoor air is smoky, heavily polluted, very humid, or full of seasonal pollen.

Bathroom fans and kitchen exhaust fans are essential. Run the bathroom fan during showers and for at least 20 minutes afterward to move moisture outside. If mirrors stay fogged long after a shower, the fan may be undersized, poorly vented, dirty, or failing. A fan that vents into an attic instead of outdoors can create a much bigger moisture problem.

For homes that are tightly sealed for energy efficiency, consider a heat recovery ventilator or energy recovery ventilator. These systems bring in controlled outdoor air while reducing the heating or cooling energy lost in the process. The right choice depends on your home’s layout, existing HVAC equipment, and moisture conditions. A professional assessment can identify whether improved exhaust, a dedicated ventilation system, or simple airflow adjustments will provide the best value.

Keep Indoor Humidity in the Comfort Zone

Humidity has a direct effect on comfort and air quality. Air that is too dry can aggravate dry skin, sore throats, and static electricity. Air that is too damp can support dust mites, mold, and mildew.

Aim for indoor relative humidity between 30% and 50% in most homes. A simple indoor air quality monitor or hygrometer can help you see what is happening instead of guessing. In damp Lower Mainland weather, use bathroom fans, repair leaks quickly, and consider a properly sized dehumidifier for basements or rooms that regularly smell musty.

Do not assume more humidity is always better in winter. If condensation forms on windows, walls, or vents, humidity may already be too high for outdoor conditions. Lowering it can protect your home from moisture damage. If your home is consistently dry, a whole-home humidifier may help, but it should be installed and maintained correctly to avoid creating standing water or mold growth.

Maintain the Equipment That Moves Your Air

Your HVAC system affects more than temperature. A neglected furnace, heat pump, air conditioner, or air handler can circulate dust, operate inefficiently, or struggle to maintain proper airflow.

Annual maintenance gives a technician the opportunity to inspect filters, blower components, drain lines, coils, electrical connections, and safety controls. For air conditioning and heat pump systems, clean coils and clear condensate drains help prevent moisture problems. For gas furnaces, boilers, fireplaces, and water heaters, professional service supports safe combustion and reliable operation.

Carbon monoxide deserves special attention. Install carbon monoxide alarms near sleeping areas and follow the manufacturer’s replacement schedule. Never use a gas oven to heat your home, and do not ignore soot, yellow flames, headaches, dizziness, or combustion odors. If you suspect a gas or carbon monoxide issue, leave the area and contact emergency services or a qualified professional.

Duct cleaning can be useful after major renovations, pest issues, water damage, or visible contamination. It is not automatically necessary for every home with dust. Before scheduling duct cleaning, check the basics first: filter condition, return-air placement, supply vents, humidity, and household sources of dust. A reliable contractor should explain why a service is recommended rather than using fear-based claims.

Know When Indoor Air Problems Need Professional Help

Some air-quality concerns are clear signs that the issue goes beyond routine cleaning. Persistent musty odors, visible mold, repeated condensation, rooms that are always stuffy, worsening allergy symptoms indoors, or uneven airflow deserve a closer look. The problem may involve ventilation, ductwork, drainage, insulation, equipment sizing, or a hidden moisture source.

Pro West Heating & Air Conditioning can assess the HVAC side of indoor comfort, including filtration options, ventilation performance, humidity concerns, and equipment upgrades that support cleaner air without sacrificing efficiency. A clear evaluation helps homeowners invest in the right solution instead of adding products that do not address the underlying cause.

Cleaner indoor air is built through small habits and smart system choices: use exhaust when moisture or fumes are created, keep filters current, control humidity, and maintain the equipment your family depends on. If your home still feels stale, damp, dusty, or uncomfortable after those steps, treat that as useful information. Your home is telling you it needs a better air-quality plan.

Are Boiler Leaks Dangerous? What Homeowners Should Do

Are boiler leaks dangerous? Learn when a leaking boiler creates water, electrical, gas, or carbon monoxide risks and when to call for help immediately.

A puddle beneath a boiler may look like a minor plumbing problem, but it can quickly affect your heat, hot water, flooring, and safety. So, are boiler leaks dangerous? They can be. The level of risk depends on where the water is coming from, how much is leaking, and whether there are signs of gas, electrical damage, or carbon monoxide.

A boiler should not leak. Even a slow drip can point to a failed seal, a pressure issue, internal corrosion, or a component nearing the end of its life. Acting early usually means a simpler repair and less disruption to your home.

Are Boiler Leaks Dangerous? It Depends on the Source

Not every boiler leak is an immediate emergency, but none should be ignored. A small amount of water from a pipe fitting or pressure relief valve may not put your family in immediate danger. It can still damage the boiler and surrounding materials if left unaddressed.

The concern becomes more urgent when water reaches electrical components, the leak is heavy or growing, the boiler loses pressure repeatedly, or you notice an unusual smell. A leaking boiler can also cause the system to shut down, leaving your home without dependable heat or hot water when you need it most.

With a gas boiler, it is also essential to separate a water leak from a gas or combustion problem. Water itself does not create carbon monoxide. However, a boiler that is damaged, poorly vented, or not operating correctly may create risks that require immediate professional attention.

When a Leaking Boiler Is an Emergency

Call for emergency help and leave the area if you smell gas, hear a strong hissing sound near the boiler or gas line, or suspect a gas leak. Do not operate switches, light a flame, or try to diagnose the source yourself. Once you are safely outside, contact your gas utility or emergency services as appropriate.

You should also treat the situation as urgent if your carbon monoxide alarm sounds or anyone in the home feels dizzy, nauseated, unusually tired, confused, or has a persistent headache. Get everyone into fresh air and seek emergency assistance. Carbon monoxide has no color or odor, which is why working carbon monoxide alarms near sleeping areas and fuel-burning equipment are so important.

A major water leak deserves a fast response as well, particularly if water is pouring from the unit, running near outlets or electrical panels, or spreading across finished flooring. In that case, turn off the boiler only if it is safe to do so, shut off the water supply if you know where the valve is, and call a qualified heating technician.

What Causes a Boiler to Leak?

Boilers are closed systems, so recurring water loss is a sign that something needs attention. The exact cause matters because the right repair for a loose fitting is very different from the right solution for a corroded heat exchanger.

A leaking pressure relief valve is a common issue. This valve is designed to discharge water when system pressure becomes too high. If it drips occasionally, the boiler may be over-pressurizing, the expansion tank may have failed, or the valve itself may no longer seal properly. Simply closing or plugging the valve is not a safe fix.

Leaks can also develop at pipe connections, circulator pumps, zone valves, drain valves, or seals around internal components. These are often repairable when caught early. Corrosion is more concerning. Over time, rust can weaken pipes, fittings, or the boiler’s heat exchanger. If the heat exchanger is leaking, replacement may be more practical than repeated repairs, especially on an older unit.

Condensing boilers add another possibility: a condensate drain issue. These high-efficiency systems produce moisture during normal operation. A blocked drain line, cracked condensate trap, or frozen exterior drain can cause water to back up or leak around the unit. The repair may be straightforward, but it should be completed properly to prevent recurring shutdowns and water damage.

Risks Beyond the Boiler Room

The most obvious risk of a water leak is property damage. Water can soak drywall, warp flooring, damage cabinets, and create conditions for mold growth. A small leak in a utility room can travel farther than expected, especially if it reaches a lower level or concealed area behind a wall.

There is also a comfort and cost issue. As a boiler loses water, system pressure can drop. Radiators or radiant heating zones may stop warming evenly, the boiler may lock out, and your home may feel colder. Repeated pressure loss also forces the equipment to work under conditions it was not designed to handle.

Trying to keep topping up the system is not a long-term solution. Fresh water introduces oxygen and minerals that can speed up internal corrosion. If you need to add pressure more than once in a while, arrange a professional inspection to find the source of the loss.

What to Do When You Find a Leak

Start by protecting people and property, not by taking the boiler apart. If the leak is small and there is no gas odor, alarm, or electrical hazard, place a container or towels beneath the drip and move valuables away from the area. Take a clear photo or short video of the leak, as this can help a technician understand what is happening before arrival.

Next, look at the boiler pressure gauge if your system has one. Most residential systems operate within a normal pressure range shown on the gauge or in the manufacturer instructions. Extremely high pressure, often near the red zone, may explain water coming from the relief valve. Do not attempt to release pressure or adjust internal components unless you have been instructed by a qualified professional.

Avoid using tape, sealant, or a temporary patch on the boiler itself. These measures can conceal a failing part, interfere with safe operation, and make a proper diagnosis harder. Do not remove the boiler cover. Gas, electrical, and combustion components should be handled by a licensed technician.

If you can safely identify the water shutoff valve and the leak is substantial, turning off the water supply may limit damage. If you are unsure which valve to use, wait for professional guidance rather than shutting off a valve that affects another part of the home.

Can You Keep Using a Boiler That Leaks?

Sometimes a technician may determine that a minor external drip does not require an immediate shutdown. But that decision should be based on the source and condition of the system, not on how small the puddle appears.

Do not continue operating a boiler that has a heavy leak, visible corrosion, unstable pressure, repeated lockouts, water near electrical wiring, or any possible gas or carbon monoxide concern. Continuing to run it can turn a repairable issue into significant equipment damage or a home restoration project.

For homeowners in Coquitlam, Metro Vancouver, and the Fraser Valley, a local heating professional can assess the boiler, identify the failed component, and explain whether repair or replacement offers better long-term value. Pro West Heating & Air Conditioning provides responsive residential boiler service, including help when a heating problem cannot wait.

Preventing Future Boiler Leaks

Annual boiler maintenance is one of the best ways to catch early warning signs before they become a breakdown. During service, a technician can inspect fittings and valves, check operating pressure, test safety controls, look for corrosion, and confirm that venting and condensate drainage are working correctly.

Pay attention between visits, too. New rust stains, a damp spot under the boiler, frequent pressure changes, gurgling pipes, or reduced heat in one part of the house are all reasons to schedule service. These signs do not always mean the boiler needs replacement, but they do mean the system deserves a closer look.

A boiler leak is rarely something that gets better on its own. A quick professional assessment can protect your home, preserve your comfort, and give you a clear answer before a small drip becomes an urgent repair.

Best Thermostat for Older Homes That Fits

Find the best thermostat for older homes by checking wiring, heating type, and smart features that improve comfort without creating installation problems.

A thermostat upgrade can make an older house feel noticeably more comfortable, but only when it matches the equipment behind the wall. The best thermostat for older homes is not always the one with the largest screen or the most app features. It is the one that works safely with your wiring, heating system, and daily routine without creating service issues.

Older homes across the Lower Mainland often have boilers, radiant heat, furnaces, fireplaces, or a mix of newer and original equipment. That variety makes compatibility the first decision. Before choosing a thermostat, identify what heats and cools your home and have the wiring checked if anything is unclear.

Start With Your Heating System

A thermostat does more than read the room temperature. It sends a signal to tell your heating or cooling equipment when to start and stop. The type of signal and power required can vary significantly between systems.

A forced-air furnace with central air conditioning usually works with a standard low-voltage thermostat. This is the easiest setup for many programmable and smart thermostat options. If the home also has a heat pump, the thermostat must be designed to manage heat pump staging and auxiliary heat correctly.

Homes with boilers and hydronic radiant heating need closer attention. A boiler may use a simple two-wire control, a zone valve, a circulator relay, or multiple heating zones. Some smart thermostats work well with these systems, while others need an added power adapter, relay, or professional installation. The wrong setup can lead to short cycling, rooms that never reach temperature, or equipment that runs when it should not.

Electric baseboard heat is another exception. It typically uses line voltage, not the low-voltage wiring used by furnaces and boilers. A standard smart thermostat cannot be installed on a line-voltage baseboard circuit unless it is specifically made for that application.

Gas fireplaces, wall heaters, and older gravity systems can also have specialized controls. In these situations, choosing by appearance alone is a costly mistake. A licensed HVAC technician can confirm compatibility before a thermostat purchase turns into an unnecessary repair call.

What Makes the Best Thermostat for Older Homes?

For many older properties, the best choice balances control with simplicity. Smart features are useful, but dependable operation comes first. Look for a thermostat that supports your heating equipment, offers clear temperature control, and can be installed without compromising the system.

A clear, accurate display

Older homes can have temperature differences between rooms, especially near drafty windows, upper floors, additions, and finished basements. A thermostat with a readable display and accurate sensing makes everyday adjustments easier. If the thermostat is located in a hallway that stays cooler or warmer than the main living area, a model that supports remote room sensors may provide better results.

Remote sensors are particularly helpful for families who spend most of their time in one area of the home. Rather than heating based solely on the temperature in a central hallway, the system can respond to the room that matters most at that time of day.

Scheduling that fits real life

A programmable thermostat can reduce wasted heating and cooling by lowering demand when the household is asleep or away. The best schedules are realistic. Setting the home dramatically colder in winter may save a little energy, but it can make morning recovery slow and uncomfortable, especially with radiant floors or cast-iron radiator systems.

For boiler and radiant heating systems, modest setbacks are usually more effective than large temperature swings. These systems often respond slowly because they heat water, floors, or heavy radiators before the room temperature changes. A thermostat with flexible scheduling is useful, but the schedule should respect how the system actually operates.

Smart controls, if the wiring supports them

Wi-Fi thermostats let homeowners adjust settings from a phone, review usage patterns, receive maintenance reminders, and manage comfort while traveling. These features are valuable for busy households, second homes, and anyone who wants visibility into their energy use.

However, many smart thermostats require a common wire, often called a C-wire, for consistent power. Older thermostats may have only two wires. Some models can operate without a C-wire, and some can use an adapter, but that does not mean every installation is suitable. A weak power setup may cause the thermostat to lose connection, cycle equipment unexpectedly, or drain its internal battery.

If your existing thermostat has limited wiring, a simpler programmable model may be the better long-term choice. Alternatively, an HVAC professional can assess whether new wiring or a compatible power solution is appropriate.

Controls for multiple zones

Many older homes have been renovated in stages. One floor may have a furnace, while an addition has radiant heat or a ductless heat pump. Others have separate thermostats for upstairs and downstairs zones.

If your home has zoning, every thermostat needs to work with the zone controls and the equipment serving that area. Replacing one thermostat without considering the full system can create uneven temperatures or put extra strain on the equipment. Zoning is highly effective when designed correctly, but it requires a thermostat strategy rather than a one-size-fits-all purchase.

Check These Details Before You Buy

Before selecting a model, remove the thermostat cover only if you can do so safely and take a photo of the existing wiring. Do not disconnect wires or assume wire colors tell the full story. A wire may be present but unused, or it may have been repurposed during a past repair.

Confirm these four details first:

  • The type of heating system: furnace, boiler, radiant heat, heat pump, baseboard, or fireplace.
  • Whether the system also provides air conditioning or uses a heat pump.
  • The number of wires connected to the existing thermostat and the terminal labels they use.
  • Whether the home has one heating zone or multiple independently controlled areas.

It also helps to consider the thermostat location. A thermostat placed beside a kitchen, exterior door, sunny window, fireplace, or supply vent can receive misleading temperature readings. Even the best thermostat cannot correct a poor location on its own. Moving it may improve comfort more than upgrading the device.

Smart Thermostat Benefits and Trade-Offs

A smart thermostat can be a worthwhile upgrade when the home has compatible equipment and the household will use its features. Automatic schedules, occupancy sensing, energy reports, and remote control can help reduce unnecessary runtime. Some models also provide filter reminders and alerts when indoor temperatures fall unusually low.

The trade-off is complexity. Wi-Fi connectivity, account setup, software updates, and additional sensors create more variables than a basic thermostat. If an older home has inconsistent wiring or a simple boiler control, reliability may be more valuable than advanced automation.

A quality programmable thermostat remains a strong option for homeowners who want predictable comfort without relying on an app. It can provide weekday and weekend schedules, clear settings, and dependable control at a lower installed cost. There is no need to pay for features you will not use.

When Professional Installation Is the Better Choice

Professional installation is recommended when you have a boiler, radiant heat, a heat pump, baseboard heating, multiple zones, unexplained wiring, or a thermostat that has been acting erratically. It is also the right call if your heating system turns on and off too frequently, does not reach the set temperature, or leaves some rooms much warmer than others.

A thermostat replacement is a good opportunity to assess the system as a whole. An experienced technician can verify wiring, confirm equipment settings, check thermostat placement, and make sure the control is not masking a larger issue such as poor airflow, a failing zone valve, or an aging boiler component.

Pro West Heating & Air Conditioning can help homeowners choose and install controls that suit their equipment, comfort goals, and planned efficiency upgrades. A proper recommendation starts with the home and system you have, not a generic product shelf.

Choose Compatibility Before Features

The right thermostat should make your home easier to live in. It should maintain steady temperatures, support efficient operation, and give you as much control as you actually want. For an older home, that may be a straightforward programmable thermostat, a smart model with room sensors, or a properly matched control for a boiler or radiant zone.

Before you buy, take a moment to confirm what is behind the wall and what is in the mechanical room. That small step helps ensure your thermostat upgrade delivers the comfort you expect instead of adding one more surprise to an older home.

How to Maintain a Heat Pump for Lower Bills

Learn how to maintain a heat pump with simple seasonal care, better airflow, and professional service that protects comfort, efficiency, and lifespan.

A heat pump that runs constantly, blows uneven air, or sends utility bills climbing is often asking for maintenance before it is asking for a major repair. Knowing how to maintain a heat pump helps protect the comfort of your home in every season, especially when the system handles both heating and cooling.

Most routine care is simple: keep air moving freely, keep the equipment clean, and catch changes in performance early. Professional service fills in the technical work homeowners should not attempt, including electrical checks, refrigerant testing, and full system calibration.

How to Maintain a Heat Pump at Home

A heat pump moves heat rather than creating it through combustion. That makes it highly efficient, but it also means airflow and clean components matter. A dirty filter, blocked outdoor unit, or neglected drain can make the system work harder than necessary.

Check and replace the air filter

Start with the filter. A clogged filter restricts airflow through the indoor unit, which can reduce comfort, increase operating costs, and put unnecessary strain on the blower motor.

Check the filter monthly during periods of heavy use. Many standard filters need replacement every one to three months, while high-efficiency filters may last longer. The right schedule depends on the filter type, the number of people in the home, pets, indoor air quality concerns, and how often the heat pump runs.

If the filter looks gray, dusty, or visibly loaded with debris, replace it. Do not assume a filter is clean simply because it has not reached the date printed on the package. Always install the replacement with the airflow arrow pointed in the correct direction.

Keep the outdoor unit clear

The outdoor condenser needs open space to draw in and release air. Leaves, grass clippings, mulch, branches, patio furniture, and snow can block airflow around the cabinet and reduce efficiency.

Walk around the unit every few weeks. Remove loose debris from the top and sides, and keep shrubs and plants trimmed back. A clear area of about two feet around the unit is a practical goal, though equipment requirements can vary by model and installation.

Do not cover an operating heat pump with a solid cover. It can trap moisture and restrict airflow. In winter, gently remove heavy snow buildup from around the unit, but never chip at ice with a sharp tool or pour hot water on the equipment. You could damage the coil or wiring.

Watch for ice, but do not panic over normal frost

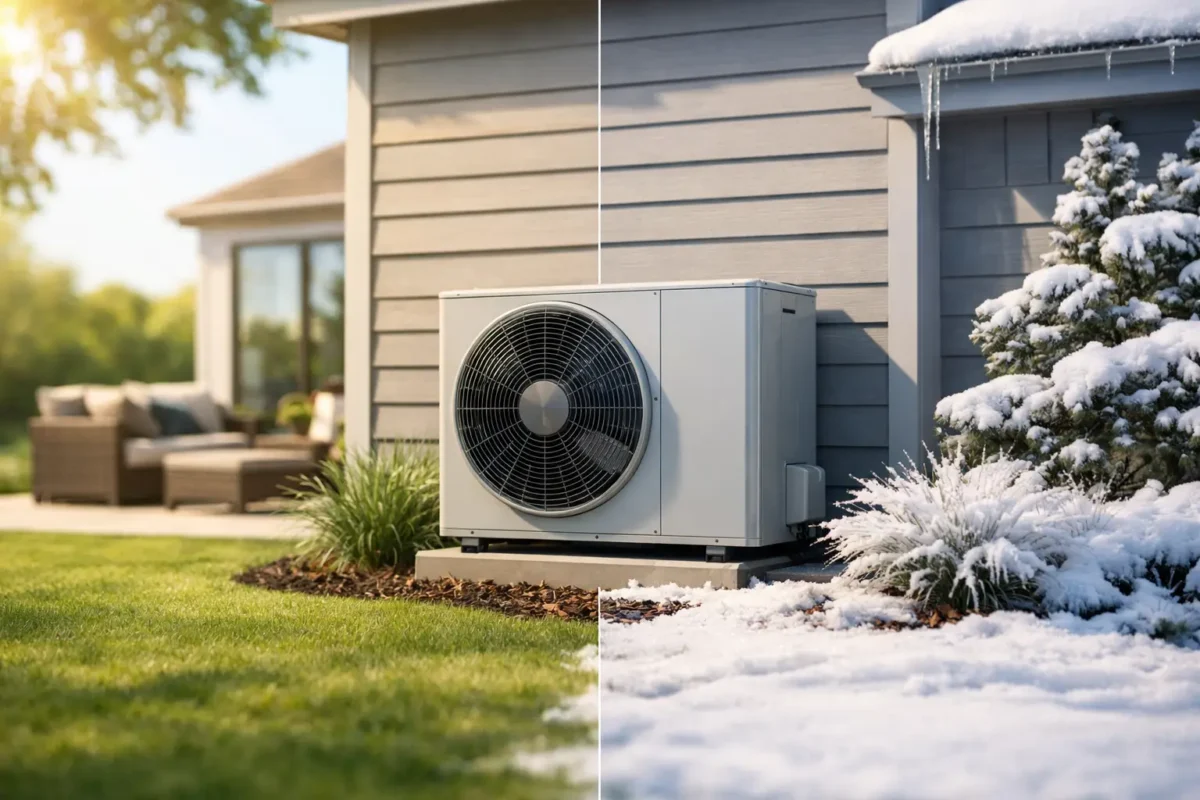
A light layer of frost on an outdoor heat pump during cold, damp weather can be normal. The system periodically enters a defrost cycle to clear the coil. During that cycle, you may see steam rising from the unit or hear a temporary change in sound. Both are usually expected.

Thick ice that remains on the coil, fan, or cabinet is different. It can point to a defrost problem, drainage issue, restricted airflow, or refrigerant-related concern. Turn the system off if ice is preventing the fan from operating, then schedule service rather than trying to force the ice loose.

Keep supply and return vents open

Closing vents in unused rooms may seem like an easy way to save energy, but it can disrupt airflow and create pressure problems in a ducted system. Keep supply registers and return grilles open, clean, and free from rugs, furniture, or curtains.

Vacuum dust from vent covers as needed. If certain rooms are consistently too warm or too cool, the answer may be airflow balancing, ductwork improvements, zoning, or thermostat placement – not simply closing more vents.

Check the condensate drain during cooling season

When a heat pump cools your home, it removes moisture from indoor air. That water drains through a condensate line. If the line becomes clogged, water can back up, trigger a safety switch, or cause damage near the indoor air handler.

Look around the indoor unit for moisture, staining, musty odors, or a full drain pan. If you notice any of these signs, arrange service promptly. A technician can safely clear the line, inspect the drain components, and make sure the system is removing moisture as it should.

Set the Thermostat for Steady Comfort

Heat pumps generally perform best with steady thermostat settings. Large temperature setbacks can cause some systems to rely on auxiliary heat to recover quickly, which may raise energy use. This is especially relevant in colder weather.

Choose a comfortable temperature and make modest adjustments when needed. If you use a programmable or smart thermostat, make sure it is configured for a heat pump. The wrong settings can bring on backup heat too often or shorten normal heating cycles.

Avoid switching back and forth repeatedly between heating and cooling during mild weather. Give the system time to respond. If it cannot maintain the set temperature, runs nonstop, or frequently switches to auxiliary heat, it is time for a professional inspection.

Schedule Professional Heat Pump Maintenance Twice a Year

Homeowner care keeps the system cleaner, but a professional tune-up protects the components you cannot see. For a heat pump that provides both heating and air conditioning, service twice a year is the most reliable approach: once before the cooling season and once before the heating season.

During a maintenance visit, a qualified technician can inspect electrical connections, test safety controls, clean indoor and outdoor coils, check the blower, verify thermostat operation, inspect the condensate system, and evaluate refrigerant performance. The technician can also identify worn components before they turn into a no-heat or no-cooling emergency.

Maintenance does not guarantee that a part will never fail. It does reduce avoidable strain and gives you a clearer picture of the system’s condition, efficiency, and expected repair needs. That information is useful when deciding whether a repair makes sense or whether a high-efficiency replacement is the better long-term investment.

Signs Your Heat Pump Needs Service

A heat pump can make some normal operating sounds, including a brief whoosh during defrost or a low steady fan sound. New, loud, or persistent changes deserve attention. Schedule service if you notice any of the following:

  • Air from the vents is consistently lukewarm when the system should be heating, or not cool enough during summer.
  • The outdoor unit is coated in heavy ice or repeatedly fails to defrost.
  • The system turns on and off frequently, runs continuously, or cannot reach the thermostat setting.
  • You hear grinding, squealing, rattling, or loud buzzing.
  • Your electric bill rises sharply without a clear change in weather or household use.
  • Water is leaking near the indoor unit, or you notice burning smells, electrical odors, or a tripped breaker.

For burning odors, repeated breaker trips, or unusual electrical sounds, turn the system off and call for professional help. Those issues should not wait for a routine appointment.

Avoid the DIY Fixes That Create Bigger Problems

Basic cleaning and filter changes are appropriate for homeowners. Refrigerant work, electrical repairs, coil cleaning with harsh chemicals, and opening sealed components are not. Heat pumps contain high-voltage parts and refrigerant systems that require the right tools, training, and safety procedures.

Be careful with pressure washers as well. High-pressure water can bend the delicate aluminum fins on the outdoor coil, reducing airflow. If the coil looks dirty, a technician can clean it properly without damaging it.

It also helps to keep a simple record of filter changes, service visits, repairs, and unusual behavior. That history gives your HVAC technician useful clues and makes it easier to spot a pattern before comfort problems become more expensive.

A well-maintained heat pump should fade into the background: steady temperatures, manageable bills, and dependable operation when your family needs it. If yours is getting louder, less comfortable, or harder to run, Pro West Heating & Air Conditioning can help you get ahead of the problem with professional heat pump service and clear recommendations for your home.

How to Fix Uneven Home Heating Room by Room

Learn how to fix uneven home heating with practical checks for airflow, insulation, thermostats, and equipment so every room stays reliably comfortable.

The bedroom that feels like a refrigerator while the living room is too warm is more than a minor annoyance. It can mean wasted energy, higher utility bills, and a heating system working harder than it should. Learning how to fix uneven home heating starts with identifying whether the problem is airflow, insulation, controls, or the equipment itself.

A few simple checks can solve certain comfort problems. Others point to a system that needs professional adjustment, repair, or replacement. The goal is not to make every room identical at every moment. It is to create consistent, comfortable temperatures without forcing your furnace, boiler, or heat pump to run unnecessarily.

Start by Finding the Pattern

Before changing vents or adjusting the thermostat, pay attention to when and where the uneven heating happens. Is one upstairs bedroom always cold? Does the problem only appear during a cold snap? Is the room over the garage uncomfortable, or does the entire far end of the house struggle to warm up?

These details narrow down the cause. A single cold room often points to an airflow restriction, heat loss, or an undersized radiator. Multiple cold rooms may indicate ductwork problems, poor system balance, or heating equipment that is not producing enough heat.

Check the temperature in several rooms at the same time using simple indoor thermometers. Compare rooms with doors open and closed, then note which rooms receive direct sunlight, have exterior walls, sit above unheated spaces, or are farther from the furnace or boiler. This information is useful whether you are troubleshooting on your own or scheduling a service visit.

Check the Easy Airflow Fixes First

For forced-air homes, conditioned air must be able to leave the supply vents and return to the system. A blocked pathway can leave one room cold even when the furnace is operating properly.

Walk through the house and make sure supply registers are fully open in rooms that need heat. Rugs, furniture, drapes, and storage bins can cover vents without anyone noticing. Avoid closing several vents to push heat toward another room. Closing too many registers can raise duct pressure, reduce system performance, and create new comfort problems elsewhere.

Return air vents deserve the same attention. These larger grilles pull air back to the furnace or air handler. If a return is blocked by a sofa, bookcase, or closed interior door, warm air may not circulate effectively. Rooms with tight-fitting doors and no return vent can become especially uncomfortable when the door stays shut overnight.

A dirty furnace filter is another common culprit. Filters protect the equipment, but when they become clogged, they restrict airflow throughout the home. Check the filter monthly during the heating season and replace it according to the manufacturer’s recommendations. Homes with pets, construction dust, or frequent fireplace use may need more frequent changes.

Make Sure Warm Air Can Move Between Rooms

Heating is not only about the air coming from a vent. It is also about the air that has a path back out of the room. In a closed bedroom, supply air can build pressure while the cooler air has nowhere to go. The result is weak airflow and uneven temperatures.

Try leaving interior doors open for a day and see whether the temperature difference improves. If it does, the home may need a better return-air strategy. Depending on the layout, a qualified HVAC professional may recommend return vents, transfer grilles, jump ducts, or carefully planned door undercuts. Each option has trade-offs involving noise, privacy, and installation scope, so it is worth getting advice tailored to the home.

Ceiling fans can also help during winter. Set the fan to rotate clockwise at a low speed. This gently brings warm air that has collected near the ceiling back into the living space without creating a noticeable breeze.

Address Heat Loss Before Blaming the Heating System

The coldest room is often the room losing heat fastest. Large windows, drafty doors, inadequate attic insulation, uninsulated walls, and rooms above garages all create extra demand that a central thermostat may not recognize.

On a cold day, run your hand near window frames, exterior doors, baseboards, and electrical outlets on outside walls. A noticeable draft is a sign that air sealing may be needed. Weatherstripping and door sweeps can make an immediate difference around doors, while window sealing and insulation improvements are often longer-term projects.

Window coverings help, but they are not a complete solution. Open curtains during sunny winter days to gain natural warmth, then close them after sunset to reduce heat loss. If a room remains cold despite good airflow, insulation and air leakage should be evaluated before installing a larger furnace. Oversizing equipment can cause short cycling and uneven comfort in other parts of the home.

How to Fix Uneven Home Heating With Better Controls

One thermostat cannot always represent the temperature of an entire house. This is especially true in multi-story homes, homes with finished basements, additions, large window areas, or rooms with different sun exposure.

First, check thermostat placement. A thermostat located near a kitchen, fireplace, sunny window, supply vent, or exterior door can read an inaccurate temperature and shut the system off too soon. It should be mounted in a representative area away from heat sources and drafts.

A programmable or smart thermostat can improve comfort by following a schedule that matches how you use the home. However, a smarter thermostat cannot correct major duct, insulation, or equipment issues on its own. If the thermostat says the main floor is comfortable while bedrooms are cold, remote sensors may help it prioritize occupied rooms at different times of day.

For persistent room-to-room differences, zoning may be the right solution. Zoning divides the home into separate heating areas using multiple thermostats and, in forced-air systems, controlled dampers. It is particularly effective for two-story homes, additions, and homes with distinct living and sleeping areas. The trade-off is higher installation cost and the need for a system designed to handle changing airflow properly.

Consider Your Type of Heating System

The right repair depends on how your home is heated. A forced-air furnace may have leaking, disconnected, undersized, or poorly balanced ducts. Ducts running through an attic, crawlspace, or garage can lose substantial heat before it reaches the room. Professional duct sealing, insulation, and balancing can often improve comfort without replacing the furnace.

In boiler and radiator homes, uneven heat may come from trapped air, low system pressure, a circulation problem, or radiator valves that are not operating correctly. A radiator that stays cool at the top may need bleeding, while a radiator that does not heat at all may need a more thorough service inspection. Do not adjust boiler controls or pressure settings unless you understand the system and manufacturer guidance.

Radiant floor heating has different concerns. Uneven floor temperature can result from zone control issues, circulation pump problems, air in the loops, or furniture and thick rugs limiting heat transfer. Heat pumps can also produce uneven temperatures when airflow is restricted, refrigerant performance is affected, or the system is not properly sized for the home.

Know When a Professional Assessment Is Worth It

Call for professional heating service if you notice weak airflow at multiple vents, loud duct noises, a furnace that runs constantly, cold radiators, repeated thermostat adjustments, unusual odors, or a sudden increase in energy costs. These symptoms can indicate more than a comfort issue. They may point to a safety concern, failing component, or system that is losing efficiency.

A proper assessment should look beyond the furnace or boiler. A qualified technician can inspect filter condition, blower performance, ductwork, combustion operation, thermostat settings, vent and return placement, boiler circulation, and overall system capacity. For homes considering an upgrade, a room-by-room load calculation is far more reliable than choosing equipment based only on the size of the existing unit.

Pro West Heating & Air Conditioning can help homeowners identify whether uneven heating calls for a straightforward repair, airflow improvement, zoning solution, or an energy-efficient system upgrade. Clear recommendations matter because the lowest-cost fix is not always the one that delivers lasting comfort.

Prevent Uneven Heating From Returning

Regular maintenance keeps small issues from turning into all-season comfort problems. Replace filters, keep vents clear, test thermostat schedules, and have heating equipment serviced before the coldest part of the year. If you make renovations, add insulation, finish a basement, or convert a garage space, revisit the heating plan as well. The system that worked for the original layout may not be balanced for the home you have now.

A comfortable home should not require everyone to wear a sweater in one room and open a window in another. Start with the simple airflow and heat-loss checks, then bring in an experienced HVAC professional when the pattern points to a larger issue. The right correction can make every room feel more livable while helping your heating system operate the way it was meant to.

Why Is My Boiler Making Noise? Common Causes

Why is my boiler making noise? Learn what common boiler sounds mean, what you can safely check, and when to call a heating professional for help at home.

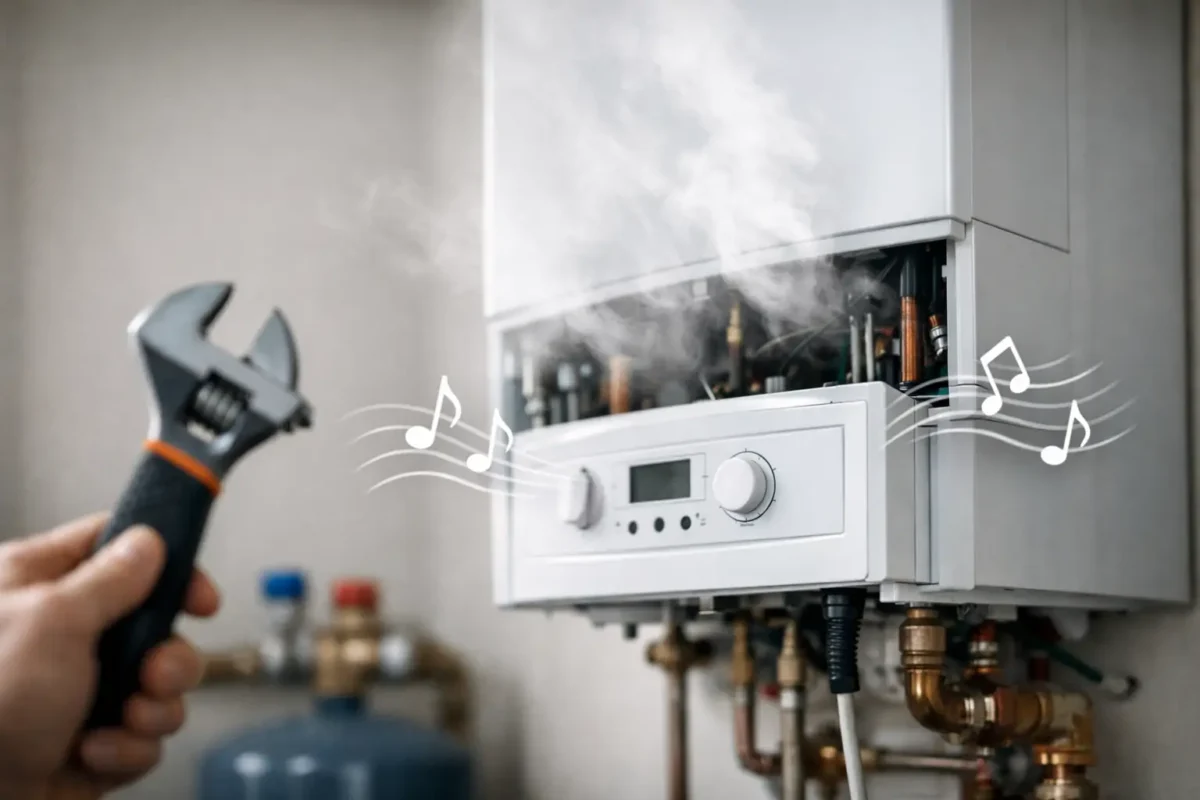
A boiler that suddenly bangs, whistles, or gurgles can make a normally comfortable home feel uncertain fast. If you are asking, why is my boiler making noise, the sound itself can offer a useful clue. Some noises are normal as metal pipes heat and cool. Others point to trapped air, water flow problems, mineral buildup, or a component that needs professional repair.

The key is knowing which sounds can wait for a scheduled service visit and which require prompt attention. A well-maintained boiler should operate steadily in the background, not demand your attention every time it starts.

Why Is My Boiler Making Noise?

Boilers make noise when water, air, pressure, heat, or moving mechanical parts are not behaving as they should. The location and timing of the sound matter. A brief ticking sound from pipes after the heat comes on is very different from repeated loud banging inside the boiler cabinet.

Older systems can be more prone to noise, particularly if they have not been flushed or serviced regularly. However, newer boilers can also become noisy due to incorrect water pressure, a faulty pump, air in the system, or an installation issue. Do not assume a noisy boiler is simply part of having an older heating system.

Kettling or Rumbling Sounds

A rumbling, popping, or kettle-like sound is often called kettling. It usually occurs when mineral deposits, sludge, or debris restrict water flow through the boiler’s heat exchanger. Water trapped in those hot areas can overheat and turn to steam, creating the familiar kettle sound.

Kettling is more common in areas with harder water, but corrosion debris in an older closed-loop heating system can create similar problems. Left alone, it can reduce efficiency, increase energy use, and put unnecessary strain on the boiler.

A technician may recommend flushing the system, cleaning the heat exchanger, treating the water, or replacing a damaged component. The right repair depends on the boiler’s age, condition, and the extent of buildup. Flushing is often worthwhile, but if a heat exchanger is heavily damaged, replacement may be the more reliable long-term choice.

Banging, Knocking, or Clanging

A single light knock may come from pipes expanding and shifting against framing as hot water begins circulating. That is common, especially in homes with radiant heating or baseboard systems. Repeated, loud banging is different.

Banging can be caused by trapped air, restricted water flow, a failing circulator pump, loose pipe supports, or pressure issues. In some cases, the sound comes from water moving too quickly through the system. If the noise begins with a sudden change in heating performance, such as cold rooms or uneven radiator heat, schedule service rather than waiting for it to worsen.

Do not try to open the boiler or adjust internal controls to stop banging. Boilers combine hot water, electricity, and in many homes, natural gas. A trained technician can identify whether the issue is in the boiler, the pump, the piping, or the heating zones.

Whistling or High-Pitched Screeching

Whistling often suggests water or air is being forced through a narrow opening. It may be related to low system water pressure, a partially closed valve, a restricted heat exchanger, or air trapped in the system. A high-pitched screech can also come from a worn pump or fan motor, depending on the type of boiler.

Check the pressure gauge only if you know where it is and can read it safely. Many residential boiler systems operate within a normal pressure range specified by the manufacturer, and that range can vary. If the gauge is unusually low or high, avoid repeatedly adding water or releasing pressure without professional guidance. An incorrect adjustment can create a larger problem or mask a leak.

Gurgling or Bubbling

Gurgling usually means there is air somewhere in the heating loop. Air pockets can prevent water from circulating properly, which may leave certain rooms cooler than others. You may hear gurgling in the boiler itself, radiators, baseboards, or pipes.

Some homeowners can bleed air from radiators, but the correct approach depends on the heating system. Hydronic baseboard and radiant systems may require different procedures, and frequent air buildup can signal a leak, a faulty expansion tank, or an issue with the automatic air vent. If gurgling keeps returning after the system is bled, it is time to have the cause diagnosed.

Humming, Vibrating, or Grinding

A low hum is often normal while a boiler is running. But a new vibration, loud buzzing, or grinding sound can point to a mechanical issue. Circulator pumps, fans, zone valves, and motors all make some operational noise, yet they should not sound strained.

Vibration may also travel through pipes or mounting brackets, making a small issue sound much louder throughout the home. A technician can determine whether a component needs tightening, cleaning, repair, or replacement. Addressing a failing pump early can help prevent a no-heat situation during colder weather.

Clicking and Ticking

Light ticking is often the least concerning boiler sound. Metal expands when heated and contracts as it cools, so pipes may tick as temperatures change. A thermostat, relay, or zone valve may also click during normal operation.

Pay attention if clicking becomes rapid, constant, or is followed by failed ignition, no heat, error codes, or a gas smell. Repeated ignition clicking on a gas boiler should be inspected promptly. The boiler may be struggling to light safely or reliably.

What You Can Safely Check Before Calling

Before scheduling service, listen closely to where the noise is coming from and when it happens. Does it start only when the thermostat calls for heat? Does it occur while hot water is running? Is one heating zone affected, or the entire home? These details help speed up diagnosis.

You can also look for visible warning signs around the boiler without removing panels: water on the floor, dripping from pipes, corrosion, flashing error codes, or a pressure gauge that appears far outside its usual range. Make a note of the boiler brand, model, and any displayed code.

Avoid taking apart the unit, adjusting gas controls, or repeatedly resetting the boiler. A reset may temporarily clear a fault, but repeated lockouts usually mean there is an underlying issue that needs repair.

When a Noisy Boiler Is an Emergency

Turn the boiler off and seek immediate professional help if you smell gas, notice smoke, see signs of scorching, or hear a loud ongoing banging that does not stop. Leave the home and contact the appropriate emergency service if you suspect a gas leak. Do not operate switches, appliances, or open flames near the suspected leak.

A water leak also deserves quick attention, especially if it is near electrical components or becoming more severe. Even a small leak can affect system pressure, damage flooring, and lead to more expensive boiler repairs.

If there is no immediate danger but your boiler is making new or worsening noises, arrange a repair visit soon. Waiting until the system stops heating can leave your household without comfort when you need it most.

Preventing Boiler Noise and Costly Repairs

Annual boiler maintenance is the best way to catch the early causes of noise. A professional service visit can include checking pressure, inspecting the heat exchanger, testing safety controls, evaluating pumps and valves, examining venting, and looking for leaks or water-quality issues.

For homes with hydronic radiant heat, regular maintenance also helps protect the circulator equipment and maintain balanced heat across different zones. A clean, properly adjusted system runs quieter, uses less energy, and is less likely to fail unexpectedly.

If your boiler is older and has recurring noise, leaks, or repair needs, ask about the cost of repair versus replacement. A high-efficiency boiler may offer lower operating costs and more dependable comfort, but replacement is not automatically the answer. A professional assessment should consider the condition of the existing system, your home’s heating needs, and the expected value of the repair.

Pro West Heating & Air Conditioning can diagnose boiler noises, restore reliable heat, and help you make a clear decision when repair or replacement is needed. A strange sound is your heating system asking for attention. Address it early, and you are far more likely to protect your comfort, efficiency, and peace of mind.

Heat Pumps for Reliable Year-Round Comfort

Heat pumps deliver efficient heating and cooling in one system. Learn how they work, what to expect, and when a professional installation makes sense.

A furnace that runs all winter and an air conditioner that works overtime in July can make home comfort feel expensive. Heat pumps offer a different approach: one outdoor system that moves heat to warm your home in cold weather and removes heat to cool it when temperatures rise. For many Lower Mainland homeowners, that means more consistent comfort, lower energy use, and fewer pieces of equipment to manage.

The right system is not simply the largest one available or the one with the lowest initial price. Your home’s insulation, existing equipment, electrical capacity, ductwork, and heating habits all affect whether a heat pump will be a smart long-term upgrade.

How Heat Pumps Work

Unlike a gas furnace or boiler, a heat pump does not create heat by burning fuel. It transfers heat from one place to another using refrigerant. Even cool outdoor air contains usable heat. In heating mode, the system draws that heat indoors. In cooling mode, it reverses direction and carries indoor heat outside.

That transfer process is why heat pumps can be highly efficient. Instead of converting fuel directly into heat, they use electricity to move existing heat. Modern cold-climate equipment is designed to operate effectively through much of a Lower Mainland winter, including damp, chilly conditions that are common in Coquitlam, Metro Vancouver, and the Fraser Valley.

A typical system includes an outdoor unit, an indoor air handler or coil, refrigerant lines, controls, and a thermostat. If your home has forced-air ductwork, a central ducted system may be the best fit. Homes without ducts may benefit from ductless indoor units installed in key living areas, bedrooms, or additions.

Heating and Cooling From One System

The practical appeal is straightforward. A heat pump can replace an aging air conditioner while also reducing reliance on a furnace, baseboard heaters, or another heating source. Instead of switching between separate heating and cooling equipment each season, your home uses one integrated comfort system.

In summer, it operates much like an air conditioner, pulling heat and moisture out of indoor air. In winter, it provides steady heat rather than the short, high-temperature bursts many homeowners associate with a furnace. That gentler operation can improve temperature consistency from room to room, particularly when airflow and thermostat placement are properly addressed.

Comfort is not just about the temperature displayed on a thermostat. A well-designed system also considers airflow, humidity, noise levels, filtration, and how different floors of the home are used. A finished basement, a sun-facing upper floor, and a rarely used guest room may have very different comfort needs.

What Happens During Colder Weather?

A heat pump’s output changes as outdoor temperatures fall. High-performance cold-climate models continue producing useful heat at low temperatures, but some homes benefit from a backup heat source for the coldest periods. This may be an existing gas furnace, electric heat strips, a boiler, or another compatible system.

This setup is often called dual fuel or hybrid heating. The heat pump handles much of the season efficiently, while the backup system provides support when conditions or operating costs make it the better choice. It is not a compromise or a failure of the equipment. In many homes, it is the most practical way to balance comfort, efficiency, and reliability.

Is a Heat Pump Right for Your Home?

Heat pumps are a strong option for many homes, but they are not identical from one property to the next. A proper recommendation starts with the house, not a sales brochure.

A professional assessment should account for your home’s square footage, layout, window exposure, insulation levels, air leakage, existing heating system, electrical panel, and duct condition. Oversizing can cause short cycling, uneven comfort, unnecessary wear, and higher upfront cost. Undersizing may leave the system relying too heavily on backup heat during colder weather.

Ductwork deserves special attention. Older ducts may be undersized, poorly sealed, or unevenly distributed. Installing efficient new equipment without resolving major airflow issues can limit the comfort and savings you expect. In some cases, duct modifications, zoning, or a ductless solution will deliver better results than forcing a central system into a layout that does not support it.

Heat pumps are particularly worth considering if you are replacing an older air conditioner, dealing with high electric resistance heating costs, planning a major renovation, or looking for a lower-emission home comfort option. They can also work alongside existing equipment rather than requiring a complete all-at-once replacement.

Understanding Efficiency, Costs, and Savings

Efficiency ratings can help compare equipment, but they do not tell the whole story. Heating performance is commonly measured by HSPF2, while cooling efficiency is measured by SEER2. Higher ratings generally indicate lower energy use under standardized conditions, but your actual results depend on weather, thermostat settings, home construction, installation quality, and local utility rates.

The installation cost also varies. A straightforward replacement using existing compatible ductwork is different from adding new electrical circuits, replacing an air handler, upgrading ducts, or installing multiple ductless zones. The lowest quote may not include the design work, commissioning, warranty support, or electrical and airflow corrections needed for the system to perform as intended.

Rebate programs can help reduce the cost of qualifying energy-efficient upgrades. Eligibility rules, available funding, required documentation, and equipment requirements can change, so it is wise to confirm options before approving an installation. Homeowners should also look beyond the rebate amount. A system should make sense for your comfort needs and expected operating costs even after incentive programs are considered.

Choosing Between Ducted and Ductless Heat Pumps

Ducted heat pumps are often a natural fit for homes with usable forced-air ductwork. They keep the familiar look of a central system, use discreet supply registers, and can serve the whole home through one indoor unit. They may also pair well with an existing furnace in a dual-fuel arrangement.

Ductless heat pumps use wall-mounted, floor-mounted, or concealed indoor heads connected to an outdoor unit. They are useful for homes with boiler heat, electric baseboards, no ductwork, room additions, converted garages, and areas that are consistently too hot or too cold. Because each indoor unit can be controlled separately, they can provide targeted comfort and reduce energy use in unused rooms.

The trade-off is visual preference and system design. Some homeowners prefer the nearly invisible appearance of central ducts, while others value the room-by-room control of ductless units. A knowledgeable contractor can explain both options without treating one as the automatic answer.

Installation Quality Protects Your Investment

The equipment nameplate is only part of the equation. Proper sizing, refrigerant line installation, electrical work, condensate drainage, airflow setup, thermostat configuration, and startup testing all shape performance.

A good installation should include a clear plan for the outdoor unit location. The unit needs proper clearance, stable mounting, drainage, and protection from avoidable snow, debris, and recirculating exhaust air. Indoor components need access for future maintenance. Small decisions made during installation can affect noise, reliability, and serviceability for years.

Before work begins, ask what equipment is included, whether your existing system will remain as backup, what changes are needed to ducts or electrical service, and how the contractor will verify performance at startup. Clear answers prevent surprises and help you compare estimates fairly.

Maintenance Keeps Performance Steady

Heat pumps need regular care, just like furnaces and air conditioners. Homeowners can replace or clean filters as recommended, keep outdoor units clear of leaves and obstructions, and avoid blocking indoor supply and return vents. Do not cover the outdoor unit tightly or stack items around it.

Professional maintenance checks the parts homeowners cannot easily assess, including refrigerant operation, electrical connections, drainage, coils, airflow, and heating and cooling performance. Annual service helps identify small concerns before they become a no-heat call or a mid-summer cooling breakdown.

If your system starts making unusual noises, runs constantly without reaching the set temperature, produces weak airflow, or leaves rooms noticeably uneven, schedule service rather than waiting for a complete failure. Prompt diagnosis is usually easier on both the equipment and the repair budget.

A heat pump upgrade should leave your home feeling simpler to manage, not more complicated. Pro West Heating & Air Conditioning can assess your existing system, explain practical options, and help you choose a solution built for dependable comfort through every season.

Why Is My AC Leaking Water? Common Causes

Why is my AC leaking water? Learn the common causes, safe steps to take, and when to call an HVAC professional to protect your home and cooling system.

A puddle near your indoor AC equipment is never something to ignore. If you are asking, why is my AC leaking water, the answer may be as simple as a clogged drain line or as urgent as a frozen coil. Acting quickly can help prevent ceiling damage, mold growth, electrical issues, and a more expensive repair.

Your air conditioner removes humidity as it cools your home. That moisture has to go somewhere, so the system collects it and sends it outside through a condensate drain line. Water is normal inside the system. Water on your floor, around the furnace or air handler, or dripping through the ceiling is not.

Why Is My AC Leaking Water Inside the House?

Most indoor AC leaks begin with a drainage problem, but several components work together to manage condensation. The location of the water, the condition of the system, and whether the AC is still cooling can help narrow down the cause.

A Clogged Condensate Drain Line

This is one of the most common reasons an AC leaks water indoors. Dust, algae, dirt, and debris can build up in the condensate drain line over time. When the line becomes blocked, water backs up into the drain pan and eventually spills out.

You may notice standing water near the indoor unit, a musty smell, or the system shutting off if it has a safety float switch. In some homes, the leak may first appear as a stain on a ceiling below an attic air handler.

A minor clog can sometimes be cleared, but the drain system should be inspected if water has overflowed. Simply removing visible water does not address what caused the backup or confirm that the pan and safety controls are still working properly.

A Dirty Air Filter Causing a Frozen Coil

A clogged air filter restricts airflow across the evaporator coil. Without enough warm household air moving over that coil, it can become cold enough to freeze. When the system shuts off or the ice melts, a large amount of water can overwhelm the drain pan and create a leak.

Other signs of a frozen coil include weak airflow from vents, reduced cooling, ice on refrigerant lines, or an AC that runs for long periods without bringing down the indoor temperature. Turn the cooling system off if you see ice. Running it while frozen can strain the compressor and increase the risk of damage.

Replace a dirty filter, then allow the system to thaw fully before restarting it. If the coil freezes again, the problem may involve low refrigerant, a blower issue, or another airflow restriction that needs professional service.

A Cracked, Rusted, or Misaligned Drain Pan

The drain pan sits beneath the evaporator coil and catches condensation before it enters the drain line. Older metal pans can rust through, while plastic pans can crack. A pan may also shift out of position after service, vibration, or an installation issue.

Many systems have a primary pan and a secondary overflow pan. Either one can leak if it is damaged or not draining correctly. Because the pan is often difficult to access, this repair is best handled by an HVAC technician who can inspect the coil area and drainage path without damaging surrounding equipment.

A Disconnected or Improperly Installed Drain Line

A condensate line must be securely connected, properly sloped, and set up to drain correctly. If a fitting comes loose, the line sags, or the pipe was installed without the right trap, water may spill before it reaches the drain.

This can happen after renovations, equipment replacement, or work performed around the air handler. It can also affect newer systems if the drain configuration was not matched to the unit’s requirements. A technician can correct the setup and verify that water flows freely during operation.

Low Refrigerant or a Refrigerant Leak

Low refrigerant pressure can make the evaporator coil too cold, leading to ice buildup and a water leak when the ice melts. Unlike a dirty filter, refrigerant does not get used up under normal operation. Low refrigerant often means there is a leak that needs to be located and repaired.

Warning signs can include hissing noises, warm air from vents, longer cooling cycles, rising energy bills, and repeated coil freezing. Adding refrigerant without fixing the leak is only a temporary solution. Proper repair requires diagnosing the source, repairing it when feasible, and charging the system to the manufacturer’s specifications.

A Failed Condensate Pump

Some homes use a condensate pump because gravity cannot carry water to the nearest drain. The pump collects water in a small reservoir and pumps it away when the level rises. If it loses power, becomes clogged, or fails mechanically, the reservoir can overflow.

You may hear the pump running continuously, hear no pump activity at all, or see water around the pump near the indoor unit. Do not assume the pump will start working again on its own. A failed pump can create a fast, recurring leak.

What to Do When Your AC Is Leaking Water

Start by protecting your home and staying safe. Turn off the AC at the thermostat. If water is near electrical wiring, the furnace control board, or other electrical components, turn off power to the equipment only if you can do so safely. Avoid standing water around electrical equipment.

Place towels or a shallow container beneath the leak to limit floor damage, then remove soaked materials such as rugs or cardboard. If the leak is coming through a ceiling, move furniture away from the area and contact a professional promptly. A bulging ceiling can hold a significant amount of water and may become a safety hazard.

Next, check the air filter. If it is visibly dirty, replace it with the correct size and type for your system. Look for obvious ice on the refrigerant line or coil access area, but do not chip at the ice or force open panels. Let the system thaw with cooling turned off.

Avoid pouring harsh chemicals into the drain line. Some products can damage drain components, create fumes, or move a clog deeper into the system. A qualified technician can clear the line, flush it safely, inspect the pan, test the float switch, and determine whether the leak is part of a larger cooling problem.

When an AC Water Leak Needs Professional Repair

Call for service if the leak returns after changing the filter, if the AC is freezing, or if the unit is not cooling properly. You should also schedule prompt service if water is leaking from the ceiling, the drain pan is cracked, the condensate pump has failed, or you suspect refrigerant trouble.

An AC leak is especially urgent when it affects a finished basement, hardwood flooring, drywall, insulation, or electrical components. The longer water remains in concealed areas, the greater the chance of material damage and mold growth.

For homeowners dealing with an active cooling problem, Pro West Heating & Air Conditioning can assess the full system, not just the visible water. That matters because a cleared drain line will not solve a recurring freeze-up, refrigerant leak, or blower problem.

How to Help Prevent Future AC Leaks

Regular maintenance is the most reliable way to reduce the risk of condensate problems. During a professional tune-up, the technician can clean the condensate drain, inspect the pan and pump, check airflow, examine the evaporator coil, and catch developing issues before water reaches your living space.

At home, replace filters on schedule based on the filter type, household conditions, pets, and system use. Keep supply and return vents open and unobstructed so the system can maintain proper airflow. During humid weather, pay attention to unusual odors, reduced cooling, or water around the indoor equipment.

Is Water Dripping Outside From My AC Normal?

Usually, yes. Water dripping from a properly connected condensate drain outside the home is often a normal result of humidity removal, particularly during hot and humid weather. The concern is water leaking indoors, pooling around equipment, or coming from places where the drain should not discharge.

Can I Run My AC If It Is Leaking Water?

It depends on the cause and location of the leak, but shutting the system off is the safest choice until the issue is understood. Continued operation can worsen overflow damage, and a leak caused by a frozen coil or electrical issue should not be ignored.

A small amount of condensation is part of normal cooling. A visible indoor leak is your system telling you that drainage, airflow, or cooling performance needs attention. Addressing it early is the best way to protect your home and get back to dependable comfort.