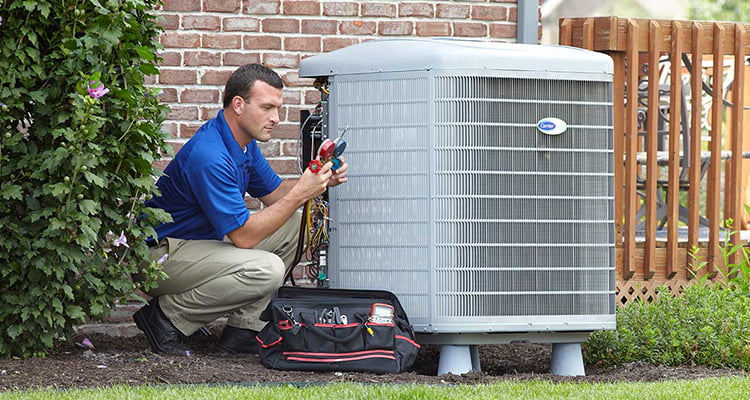
There’s nothing quite like walking into a cool, air-conditioned home after being out in the summer heat. If you’re considering a central air conditioner to keep your house comfortable, you’re making a wise choice.
Unlike portable or window units, this system provides consistent cooling throughout your entire home. But what exactly does the installation process entail? Hear from an HVAC expert. From evaluating your home’s needs to the final testing phase, this comprehensive guide will walk you through each step.
By understanding the process, you can ensure a smooth installation and enjoy the benefits of a comfortable, cool home all summer long.
Preparing For Central Air Conditioner Installation
Before installing a central air conditioner, you must assess your home’s cooling needs. How large is your home? What kind of insulation does it have? These factors will help determine the size and type of system you need. It’s also essential to consider the climate in your area.
An efficient system is crucial for Canadian homes where summers can get quite hot.
Selecting the right central air conditioner is vital. You need a system that is the right size for your home. If it’s too small, it won’t cool your home effectively. If it’s too large, it will cycle on and off too frequently, leading to increased wear and tear.
Installing a central air conditioner can be a significant investment. It’s essential to budget not just for the unit itself but also for installation costs. The installation process involves several steps, including ductwork, electrical work, and potentially upgrading your home’s insulation. Make sure to get a detailed estimate from your HVAC contractor.
The Installation Process
Step 1: Evaluating Your Home
The first step in the installation process is thoroughly evaluating your home. The HVAC technician will inspect your existing heating and cooling system, assess your ductwork, and determine the best location for the new unit.
This evaluation ensures that the installation process goes smoothly and that the new system will operate efficiently.
Step 2: Removing The Old System
If you have an existing air conditioning system, it must be removed. This process includes safely disconnecting and disposing of the old unit. Proper disposal is crucial to ensure environmental safety and compliance with local regulations.
Step 3: Installing The New Unit
Once the old system is removed, the new central air conditioner can be installed. This step involves several components:
- Mounting the Indoor Unit: The indoor unit, also known as the evaporator coil, is typically installed near your furnace or air handler. This unit will connect to your existing ductwork to distribute cool air throughout your home.
- Installing the Outdoor Unit: The outdoor unit, or condenser, is placed outside your home. To maximize efficiency, it should be located in a shaded area. The technician will ensure it is level and has proper clearance for airflow.
- Connecting the Units: The indoor and outdoor units are connected by refrigerant lines, electrical wiring, and a drain line. These connections are critical for the system’s operation and must be done correctly to avoid leaks or malfunctions.
Step 4: Connecting The Ductwork
If your home already has ductwork, it may need to be inspected and potentially upgraded to ensure compatibility with the new system. In some cases, new ductwork may need to be installed. Proper ductwork is essential for distributing cool air evenly throughout your home.
Step 5: Electrical And Thermostat Installation
The next step involves connecting the central air conditioner to your home’s electrical system. This process should always be done by a licensed electrician to ensure safety and compliance with local codes.
Additionally, a new thermostat may be installed to provide better control over your home’s temperature.
Step 6: Testing The System
After the installation, the HVAC technician will test the system to ensure it works correctly. This testing includes checking the refrigerant levels, ensuring adequate airflow, and verifying that the thermostat is functioning properly. The technician will also show you how to operate and maintain your new system.
Post-Installation Considerations
Regular maintenance is crucial to keeping your central air conditioner running smoothly. This maintenance includes changing the air filter, cleaning the coils, and scheduling annual check-ups with a professional HVAC technician. Regular maintenance helps prevent breakdowns and extends the life of your system.
Even with proper maintenance, your central air conditioner may encounter issues. Common problems include inadequate cooling, unusual noises, and high energy bills. If you experience any of these issues, it’s essential to contact a professional for diagnosis and repair.
To get the most out of your central air conditioner, consider adding additional upgrades to your home. Improving insulation, sealing windows and doors, and using a programmable thermostat can all help maximize your system’s efficiency.
These upgrades can also reduce energy bills and improve your home’s comfort.
About Us
At Pro West Heating & Air Conditioning, we are dedicated to providing top-quality HVAC services to our clients. With years of experience and a commitment to excellence, we ensure your home stays comfortable year-round.
Contact us today to learn more about our services and how we can help with your heating and cooling needs.